 |
|
|
We’ve always wanted to live in a fish tank. There – we said it!
So we have odd ambitions. At least with the DIY Fisheye Lens, we’re (kinda) there. With it, we can give our photos that wonderfully distorted “fisheye” perspective – the one we’d like to think fish see everything from.
Best of all, we’re making the DIY Fisheye Lens with nothing more than some tape and a lens from a pair of old eyeglasses.
So join us in our blissful underwater world, by making your own!
(Put your fins together for Melissa Lawson, the wonderful creator of the DIY Fisheye Lens, who’s sharing it with us today!)
p.s. Something new we’ve been working on: CommandShift3.com.
What is it and why’s it cool?
All cameras have lenses – they’re what gets the world ‘out there’ funneled into your camera as an image, one that can then be imprinted onto film or a digital sensor or whatever. A Fisheye lens has an extremely wide angle that takes in a very broad, hemispherical image, lending a neat little “round” effect to things.
Fisheyes are the uber-talented “Peripheral Vision Man” of the superhero squad, capturing sometimes up to a 220-degree field-of-view, although usually it’s more around 180 degrees.
Bottom Line: you can pack in a lot of information into your pictures with a Fisheye. They’re insanely useful for getting way up close to some sports action while still taking in a lot of what’s happening around the player in the shot. They’re also really neat for landscape photography, and a lot of people use ‘em to capture full night skies too.
Ingredients

- A digital SLR (sorry point-and-shooters, though we’ve got something special for you at the end!)
- A pair of old glasses – One that you don’t mind decimating into oblivion. They need to be “Positive” lenses (i.e. for Far-Sighted people.) They also need to have a fairly strong prescription – the stronger the prescription, the thicker the lens… and the thicker the better. This is what’s going to give you your fisheye effect.
- Electrical or masking tape – It’s how you’ll keep everything together.
Putting It All Together


 |
You’ll be mighty impressed with how easy this is; basically you’re taking the lens from the eyeglasses and taping it onto the camera.
Step 1:
Pop the lens out of the glasses. Apologize to grandma if she sees you doing this with her favorite pair of glasses.
Step 2:
Tear off two pieces of electrical or masking tape long enough to fit around your glasses’ lens, then stick ‘em onto the top and bottom edge of it.
Step 3:
With the tape ready for action, carefully put your newfangled fisheye lens over your camera’s lens, the same way the eyeglass lens normally would be in its frame.
Step 4:
With the tape, secure everything down so that the eyeglass lens ain’t budgin’ from your camera’s lens.
There ya are!
Shooting with your Fisheye Lens
When you’re shooting with your new Fisheye lens attached, keep your regular camera lens zoomed out as much as possible – or if you have multiple lens, stick the one that’s the widest on. Remember to keep the camera lens at the same length when the Fisheye is on – so no zooming! You’ll lose the fisheye effect if you do so.
If you’re going to use your auto-focus while you shoot, go ahead and allow it to focus – but then switch it to manual before you finish taking the photo. The Fisheye throws off your camera’s focusing computer, so it will endlessly keep refocusing and never take the picture.
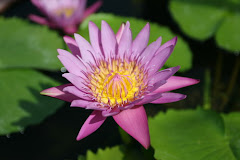
The Results!
Here are some of the results we got – but try it out for yourself too!


(And the rest of the DIY Fisheye Lens Flickr set!)
Extra goodies and ideas
- Love the fisheye effect, but want to use it on older photos that you took back in the sad caveman days prior to the DIY Fisheye lens? If you have Photoshop, then try out the Spherize filter; a little bit of tweaking yields great Fisheye-like results. Also try out the Pinch and Distort filters – most versions of Photoshop should have all three. If you’re lucky enough to have Photoshop CS3, then there’s a new Fisheye filter that’s even better! There’s also a number of Photoshop tutorials that all make use of some variation on these filters.
- Don’t have an SLR? Point-and-shooters can try out the $11 DIY Wide-Angle Lens that we wrote about ages ago. It’s really nifty, and gives you a great wide-angle, similar to a Fisheye’s.
- Fisheye + Spinning Children = Too Cool for School. We haven’t tried this for ourselves yet, but we suspect combining the DIY Fisheye Lens with this method of taking photos of spinning children would yield some pretty nifty results.
Ah, the life of a fish. Now that we’ve got a Fisheye lens stuck on our camera, we’ll never go back.
(Once you try this out, we’d love to see how it goes – would you post your results in the ‘Jojo forums for us? Thanks.)


